

How To Set Network Priority Windows 10
Contents
- Change priority of network cards (wired or WiFi) in Windows x
- Modify priorities with Windows PowerShell
- Change priority of saved WiFi networks in Windows x
Alter priority of network cards (wired or WiFi) in Windows 10
The Windows x operating organisation always gives priority to wired networks over wireless WiFi networks, something completely normal considering they tend to be more reliable, faster and more than stable than WiFi networks. If you lot want to modify the priority or see how you accept information technology configured in your operating system, information technology is really simple, in addition, you lot can as well configure different forms of the behavior of the network configuration.
To deport out all these configurations, you must go to Windows / Configuration, where we will meet all the categories of configuration options that we have available
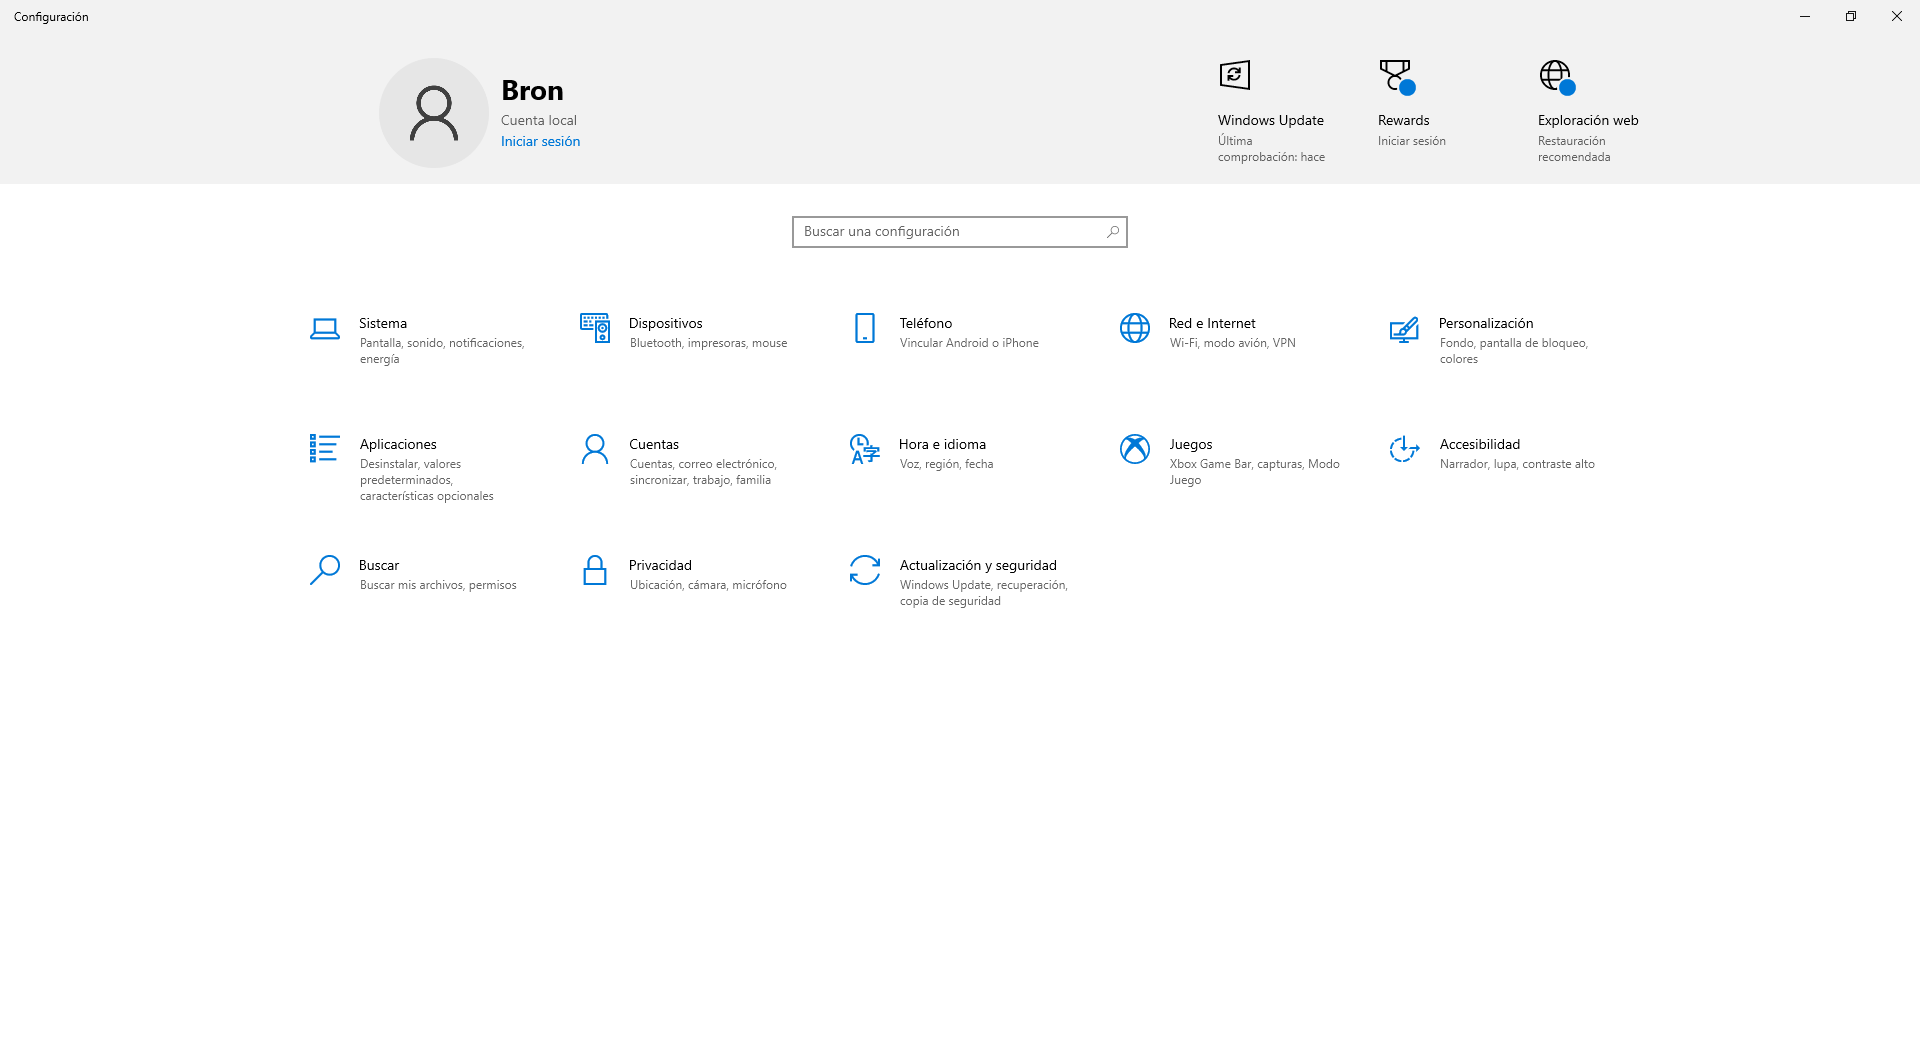
Once inside here, nosotros take to click on "Network and Internet" where it volition take us to the specific bill of fare for the network configuration.
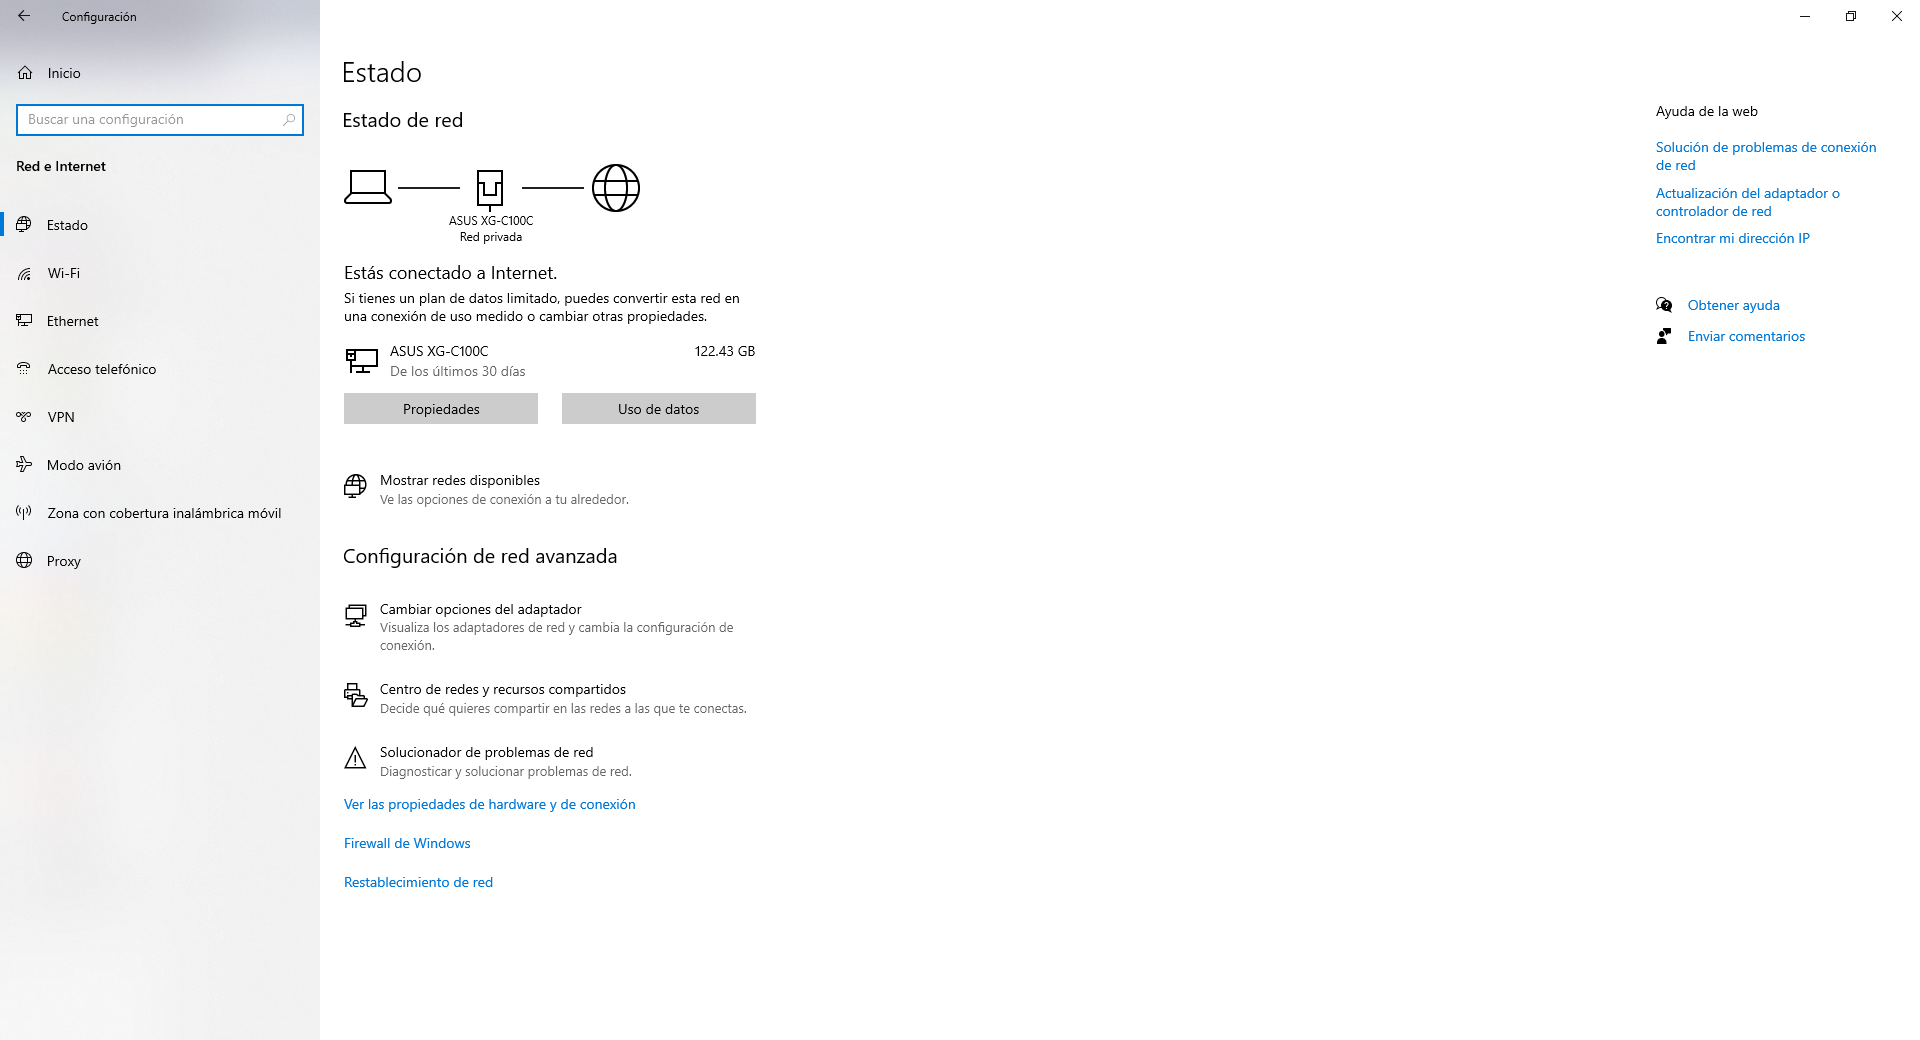
At present we must click on " Change adapter options " to access the advanced network settings. When we click hither, it will take united states directly to "Control Panel / Networks and Shares / Change adapter settings". So this configuration tin be accessed in both ways, our favorite is to go directly to the control panel, although the number of steps are exactly the aforementioned.
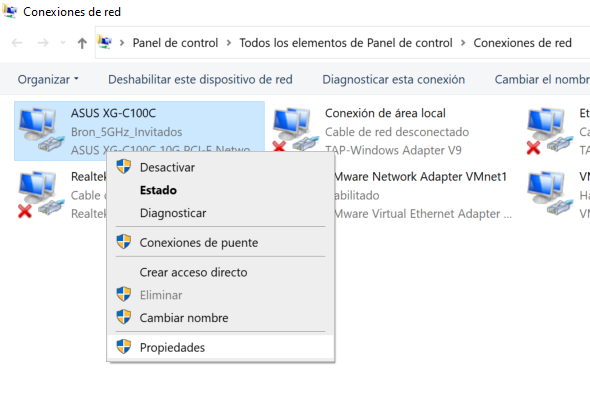
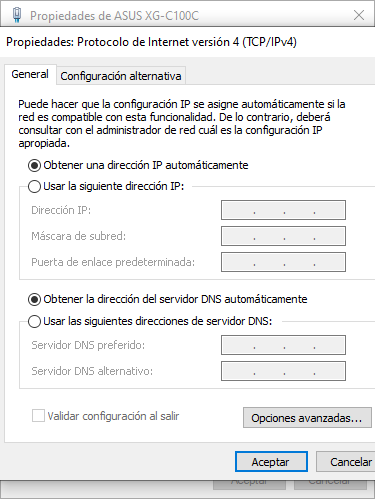
Once inside this menu, nosotros will take to choose the WiFi network bill of fare that we want to prioritize or non, by default the prioritization is "Automatic" and Windows will always give priority to cable connectivity. We choose the Ethernet or WiFi network card and click on « Backdrop «.
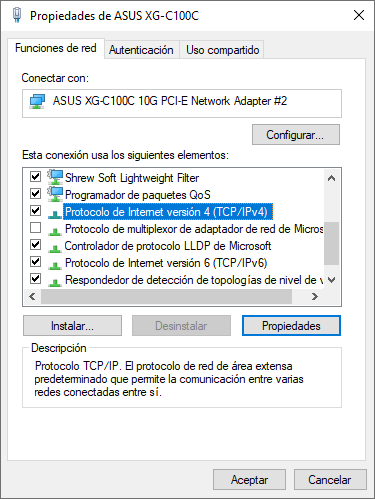
One time we take clicked on "Properties" we put "Cyberspace Protocol version 4 (TCP / IP) and click on" Properties "again:
Now we will run into the configuration of the network at the IP and DNS level, now we must click on the function of «Avant-garde options» that we take at the bottom:
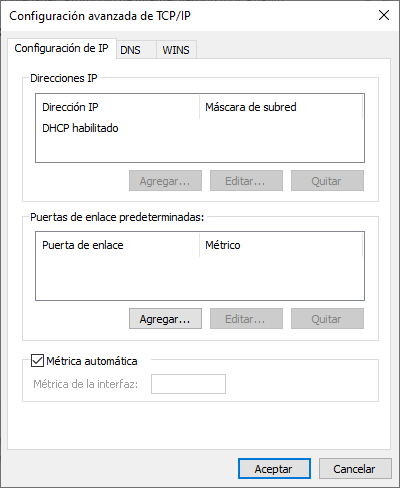
This menu is where we tin can configure our network adapter in an advanced way. We tin can add dissimilar configurations that nosotros have and requite them different types of priorities. For example, if nosotros put a fixed IP, we accept the possibility of putting different fixed IP addresses to adjust to the dissimilar networks where we are going to connect our PC, past default it is with DHCP, therefore, nosotros will non have this functionality enabled.
Another option is the possibility of configuring the default gateway with its metric, in this way, we tin can register different gateways with different priorities. The gateway with the lowest metric volition accept the highest priority, every bit is often the example with routers and networking equipment.
Correct at the lesser we accept the option of "Automatic metric" of the network adapter, if we deselect this function and we put a specific metric, nosotros volition give priority or not to this network interface. The lower the number in the interface metric, the higher the priority of the network adapter, and the higher the number of the network adapter, the lower the priority. For instance, if we put a metric 10 to this wired network adapter, and later we put a metric five to a wireless network adapter, the latter will exist the one that has priority in the operating system.
Every bit y'all have seen, information technology is really easy to change the priority of the network adapter through the graphical user interface, however, we also have the possibility to do information technology through the console with Windows PowerShell.
Alter priorities with Windows PowerShell
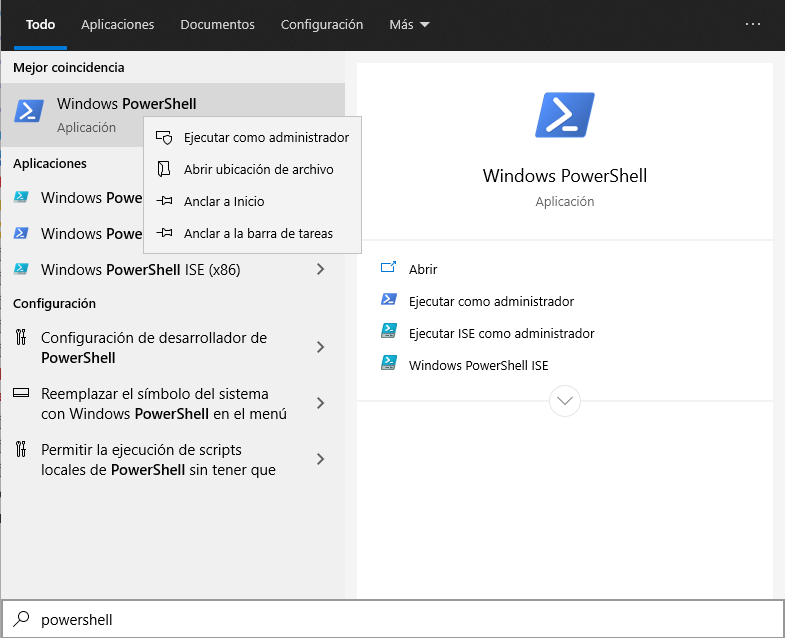
If we desire to practice it with Windows PowerShell, what we have to do is open it with ambassador permissions (Run as ambassador):
In one case inside the console, nosotros can put the following command that will show u.s. the priorities (metric) that the unlike adapters have in the "InterfaceMetric" section:
Get-NetIPInterface
If we want to change the priority of a certain adapter, nosotros but have to put the post-obit:
Set-NetIPInterface -InterfaceIndex INDICE -InterfaceMetric METRICA
For example:
Set-NetIPInterface -InterfaceIndex 20 -InterfaceMetric 5
If we run the display command over again, we can come across that the changes accept been applied correctly:
Get-NetIPInterface
If nosotros want to get out it as information technology was with the automatic metric, nosotros must execute the post-obit command:
Set-NetIPInterface -InterfaceIndex 21 -AutomaticMetric enabled
In this easy way and with commands, we will be changing the priority easily.
Change priority of saved WiFi networks in Windows 10
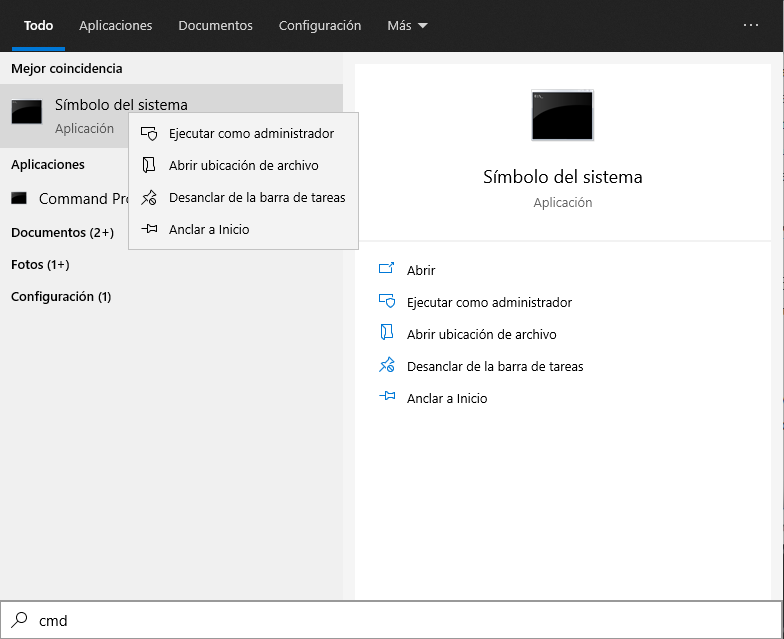
If, in add-on to changing the priority of the network cards you lot have on your figurer, you lot also have the possibility of changing the priority of the WiFi networks saved on your computer. In this case, what we must do is open a "cmd" console with administrator permissions:
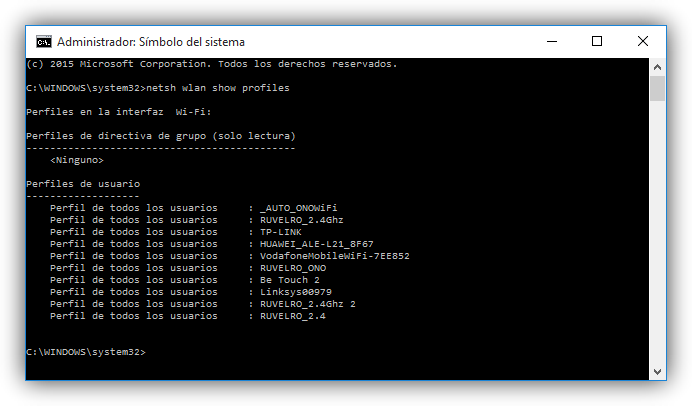
Once inside, y'all will have to execute the following command to verify the different WiFi network profiles saved on your computer:
netsh wlan show profiles
The kickoff thing we will come across will exist a list with all the Wi-Fi networks that we have saved in Windows 10. As we can come across, the networks are ordered according to their historic period, with the offset network we connect to being the one at the top of the list and then on. until the most recent network, the last.
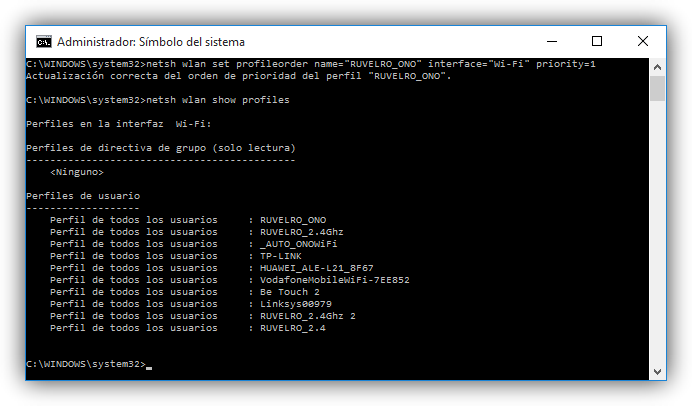
To change the priority of a network we must then type the following command, entering the corresponding proper noun of the network to modify:
netsh wlan set profileorder proper noun="nombre_de_la_red" interface="Wi-Fi" priority=1
In this fashion, the network that we have chosen volition accept " priority 1 ", that is, the maximum i in a higher place the others. In the case of wanting to social club the priority of other networks, we can do then by modifying the name of the network and the value of the « priority » parameter by 2, 3, iv, etc.
As you take seen, it is really easy in Windows operating systems to alter the priority of the WiFi networks to which we are going to connect, in this way, nosotros can prioritize some SSIDs (WiFi profiles) over others when connecting. For example, if nosotros accept a two.4GHz network and some other 5GHz network, we can prioritize the connection to the 5GHz ring network, which will unremarkably provide usa with higher performance and less interference with neighboring networks.

How To Set Network Priority Windows 10,
Source: https://itigic.com/change-priority-of-network-cards-and-wifi-in-windows-10/
Posted by: smithpustrythe.blogspot.com
0 Response to "How To Set Network Priority Windows 10"
Post a Comment